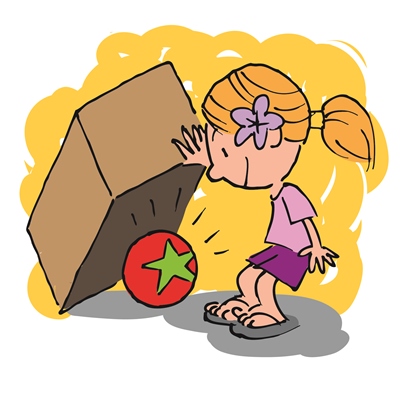
This guessing game supports a preschooler's critical thinking and language development.
What You Need:
- Small box
- Small household objects
- Blanket
What To Do:
- Find and place different household objects into a box. For example, a comb or spoon, a rubber slipper, a small stuffed animal, and whatever else you want to add to the box.
- Cover the box with a small blanket and ask your child to place her hand in the box to feel the objects. Have her choose one, but do not take it out of the box. Ask her to describe how it feels, and guess what it is.
- Have your child place some items in the box and cover them up. Now it’s your turn to guess.

Encourage keiki to move their bodies to this active movement poem.
What You Need:
Large open space
What To Do:
- Act out the movements of “Big Steps, Little Steps” with your toddler:
Big steps, big steps, big steps (Take long steps.)
Little steps, little steps, little steps. (Take small steps).
Big steps, little steps. BIG STEPS!
- After acting out the movements of the poem, have fun with counting. Ask her if she can take three big steps. Count as she does this. Try a different number of steps.
Variation: Repeat the following rhyme as you show your toddler how to jump up and down with two feet:
Jumping feet, jumping feet, jump, jump!
Up to the sky, away up high
Jumping feet, jumping feet, jump, jump!

An easy and protein packed snack, breakfast, or lunch to make with keiki.
What You Need:
- 4 hard-cooked eggs, shelled
- 3 tablespoons mayonnaise
- 1 teaspoon Dijon mustard
- Salt and pepper to taste
- Paprika
- Optional garnishes: minced parsley, slivered green or red pepper, sliced olives or pickles, capers
What To Do:
- Together with keiki, cut cooked eggs in half; carefully remove yolks and place yolks in a small plastic sandwich bag. Set whites aside.
- Add mayonnaise, mustard, salt, and pepper to yolks.
- Close the plastic bag and mix by squeezing the bag until the mixture is smooth and creamy.
- Cut off a corner of the bag and allow keiki to squeeze the mixture into the reserved egg whites. Sprinkle with paprika and top with garnishes. Makes 4 servings.

Providing space and time for your infant to have floor time supports their developmental needs.
What You Need:
- Soft surface (e.g., soft blanket, towel, or rug)
What To Do:
- Place your infant on a soft blanket, towel, or rug on the floor to give her a chance to look at new things.
- Change her position or the position of the blanket after a few minutes.
- Notice what your infant is interested in. If she looks at something, talk about it. For example, “You see the fan. It is spinning round and round. Do you feel the cool air?”
- Wiggle your hand to get your infant’s attention.
- Slowly “walk” your fingers up and around her leg.
- End the “walk” with a gentle tickle or a soft pat on her tummy.
Variation:
Sit on the floor and hold your infant upright on your lap. Talk about things that you both see, hear, or feel.

